
SUSAN FOWLER
Adventure seeker // Dream follower
I like living life to the fullest
explore
welcome to my
home on the web
Weddings
Engagements
personal
families
Tips & Tricks // The Editing Process
After 4 years of working in Lightroom, I’ve gotten my typical editing process pretty down pat. However, each image demands it’s own tweaks and sometimes there’s an image that you want something special for, but you just can’t quite figure it out.
One of those images happened for me last week. I edited this one first:
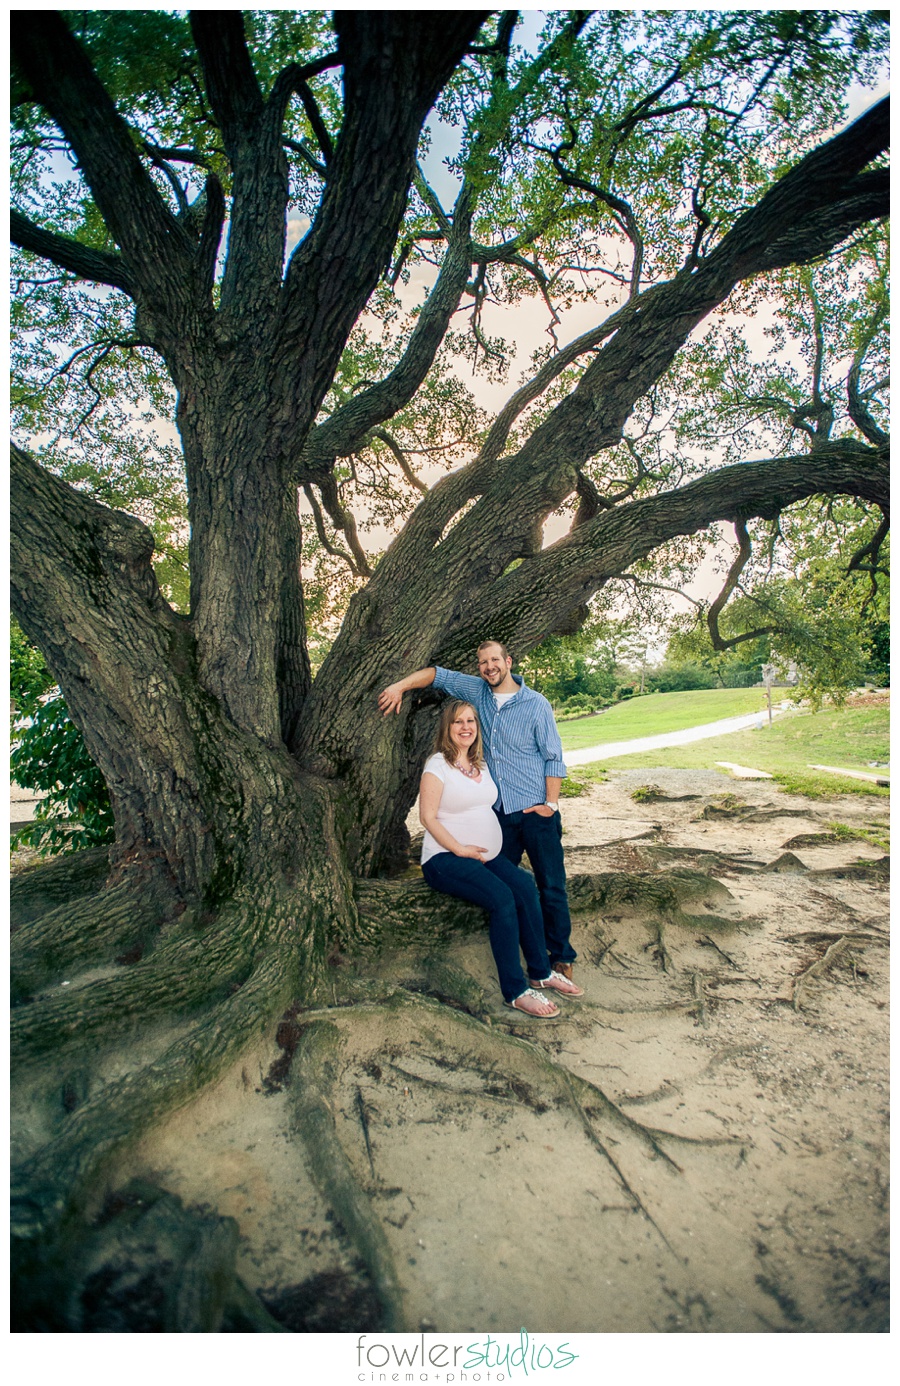
I love the image! The sunset & the beautiful couple… ahh… aren’t they just gorgeous?
But because this is a little outside of my typical style, I wanted to have a few other images in the session to pair it with style-wise. The sky wasn’t working with us too well that night, so we only had a few shots where the colors were good. I landed on this one:
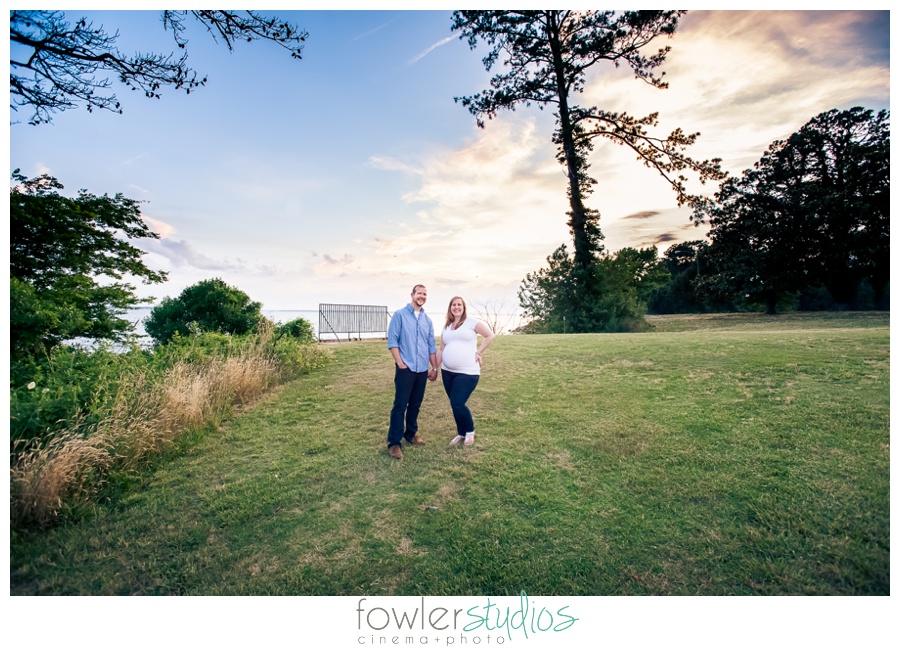
Bingo! It’s definitely not as dramatic as the last image, but still nice. When I was finished editing it I realized that it was quite different from the original! Here’s before & after:
 If you’re familiar at all with editing software, you might be a bit surprised to find out that this was all done in Lightroom 4! I’m a big fan of using things to their full potential, and I feel like I used quite a bit of the features within this program to make this image really pop.
If you’re not familiar with Lightroom, then this might not make much sense. It’s definitely not a tutorial or anything, but a peek into some editing. To start with, a little image info:
1/125 (yikes!) ISO 1250 f/5.0 17mm <— definitely not my typical settings. I like to shoot wide open and with a minimum of 1/200 second shutter speed. But I wanted f/5.0 for the surroundings and I didn’t want to bump up the ISO too much because I’m not a fan of grain, even though the camera handles it well. Plus, they’re adults and capable of standing still for a second. 🙂 And of course this image was shot in RAW.
Also, it’s worth mentioning that a little external lighting would have made the in camera look similar to my finished product. But I didn’t have everything set up & didn’t want to spend the last few seconds of daylight setting it up. 🙂
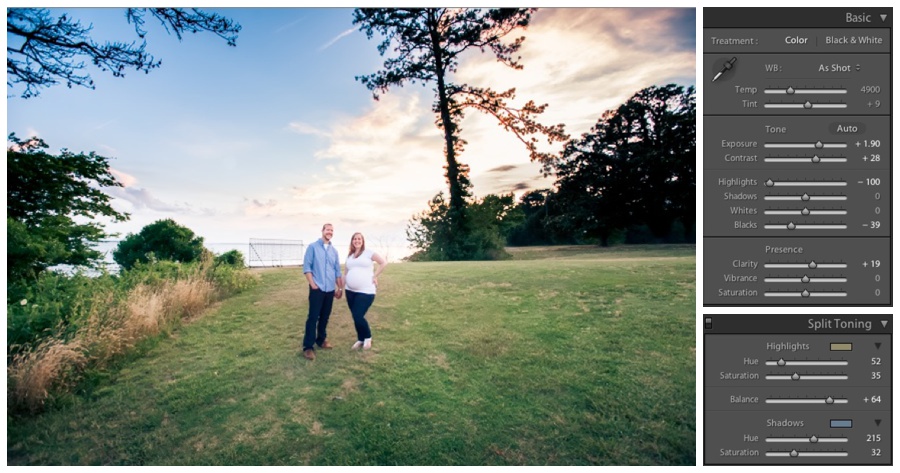 At first, this is what I ended up with, just by changing the basic settings alone. At first the sky was too bright, then I brought it all way dark so I could see what was salvageable in the sky. Finally I landed on a graduated filter for the sky.
 Then I brought in two more graduated filters for the right and bottom sides. I bumped up contrast & saturation a tiny bit on both as well. Then, in the second picture below you’ll notice I made some of the grass greener. I just used the tint brush set all the way to green & filled it in. Once I got the areas covered that I wanted to, I brought in a little more pink to make the grass look natural.
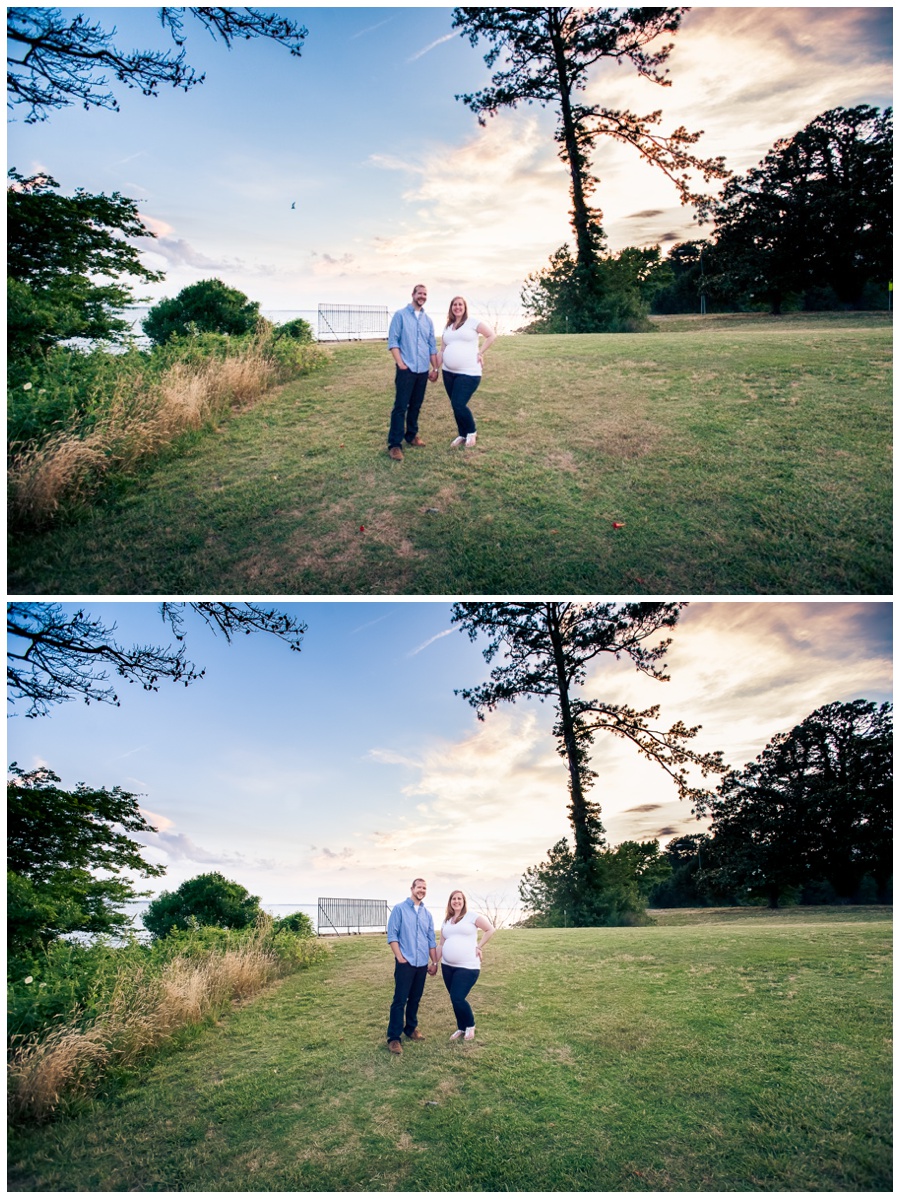
Despite being a more edited look than I normally go for, I still strive to make it mostly true to life. It’s just my editing style. So rather than make every blade of grass green, I left some brown patches in. I did take out a street light, a construction sign, and a distracting bird (it was so far away it just looked like dirt on the screen). I left the fence behind them just because I can’t take that out in Lightroom 4. Small, isolated items (like the streetlights and birds) are a cinch to take out in Lightroom 4, but the fence doesn’t have enough space around it to be done with this program, so I’ll have to use Photoshop for that.
I hope this helped you get a peek at my editing, and if you’re not familiar with graduated filters, start practicing! They’re pretty awesome!